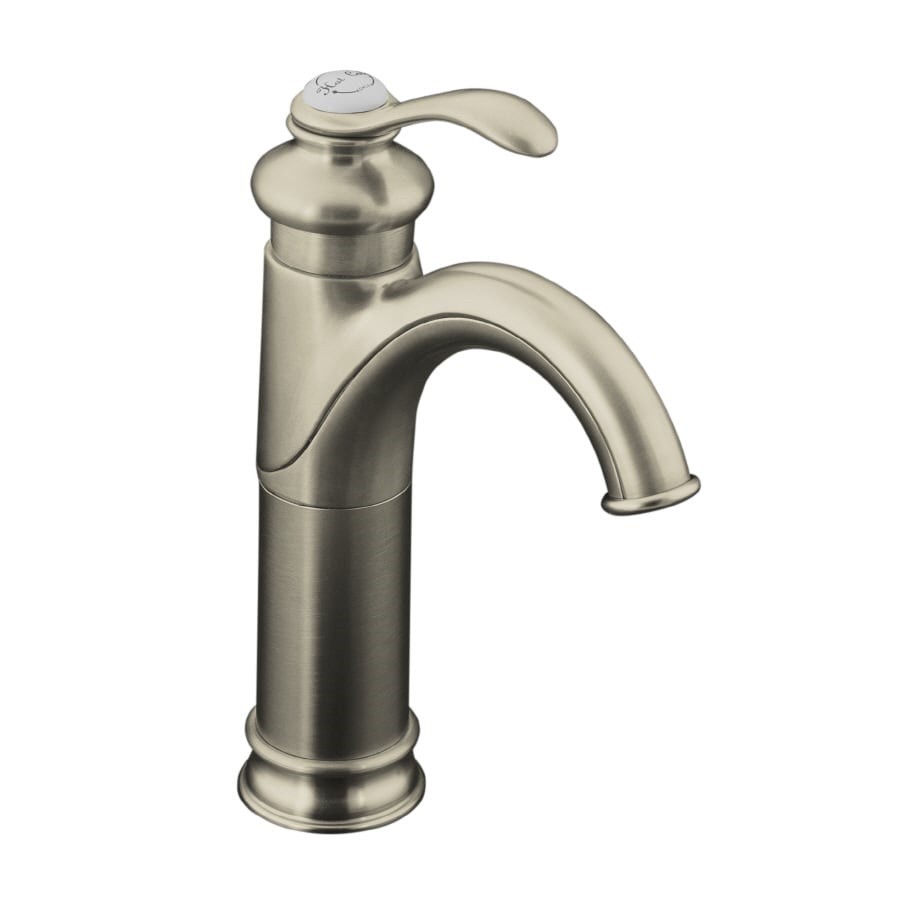
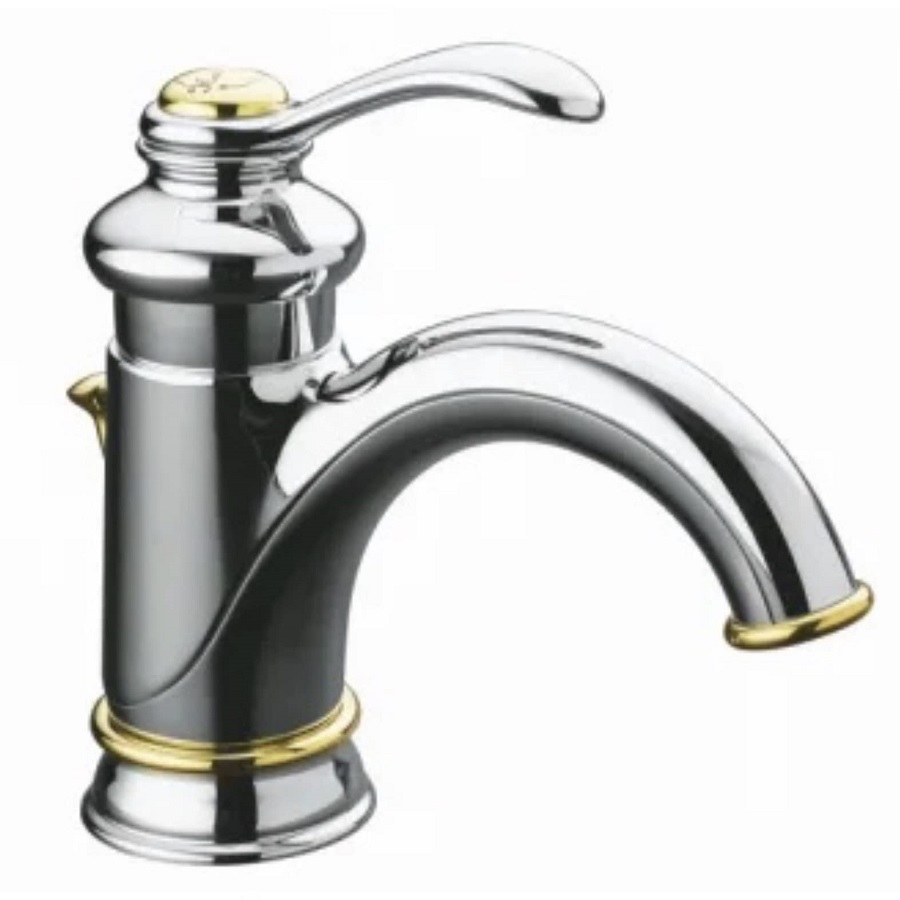
The kohler fairfax lavatory faucets collection offers a range of lavatory faucets that combine style and functionality. With a sleek design and durable construction, these faucets are a popular choice for bathroom renovations and upgrades. Installing a Kohler Fairfax lavatory faucet is a relatively simple process that can be completed with basic tools and a few key steps. In this guide, we’ll walk you through the installation process for a Kohler Fairfax lavatory faucet, from preparing the workspace to testing the water flow.

Gather Your Tools and Materials
Before you begin the installation process, it’s important to gather all the tools and materials you’ll need. Here’s a list of the basic items you’ll need to install a Kohler Fairfax lavatory faucet:
- Kohler Fairfax lavatory faucet
- Adjustable wrench
- Plumber’s putty or silicone sealant
- Screwdriver
- Teflon tape
- Towel or rag
- Bucket
- Safety glasses
Once you’ve gathered all the necessary tools and materials, you’re ready to begin the installation process.
Prepare the Workspace
To start, turn off the water supply to the sink where you’ll be installing the faucet. Locate the shut-off valves under the sink and turn them clockwise to shut off the water flow. Once the water supply is turned off, open the faucet to release any remaining water in the lines. Place a towel or rag in the sink to catch any water that may drip during the installation process.
Remove the Old Faucet (if applicable)
If you’re replacing an existing faucet, you’ll need to remove it before installing the new Kohler Fairfax lavatory faucet. Use an adjustable wrench to loosen and remove the nuts that secure the supply lines to the faucet. Once the supply lines are disconnected, use a screwdriver to remove the mounting nuts that hold the faucet in place. Lift the old faucet out of the sink and clean any remaining sealant or debris from the installation area.

Install the Kohler Fairfax Lavatory Faucet
Begin by applying a small amount of plumber’s putty or silicone sealant to the base of the faucet. Insert the faucet into the pre-drilled holes in the sink and press it firmly into place. From under the sink, thread the mounting nuts onto the faucet tailpieces and tighten them with an adjustable wrench. Be careful not to overtighten the nuts, as this can damage the faucet or sink.
Next, connect the supply lines to the corresponding hot and cold water valves. Use Teflon tape to wrap the threaded ends of the supply lines before attaching them to the valves. Tighten the connections with an adjustable wrench, taking care not to cross the threads.
Test the Water Flow
Once the faucet is securely installed, turn the water supply back on and check for any leaks. Slowly turn the handles to allow water to flow through the faucet. Check the connections and fittings for any signs of leaking, and tighten as necessary. If everything is secure, test the hot and cold water flow to ensure the faucet is working properly.
Replace the Drain Assembly (if applicable)
If you’re also replacing the drain assembly, you’ll need to install the new drain tailpiece and stopper. Apply plumber’s putty or silicone sealant to the flange of the drain tailpiece and insert it into the bottom of the sink drain. From under the sink, thread the locknut onto the tailpiece and tighten it with pliers.
Once the drain tailpiece is secure, install the stopper by placing it in the open position and inserting the ball rod into the hole in the back of the drain body. Attach the clevis strap to the ball rod and secure it with the spring clip. Finally, test the stopper to ensure it opens and closes properly.
Finishing Touches
After installing the faucet and drain assembly, wipe down the installation area to remove any excess sealant or debris. Double-check all connections and fittings to ensure everything is secure and leak-free. Once everything is in place, turn on the water supply and test the faucet and drain assembly one final time before using the sink as usual.
With the installation complete, you can now enjoy the stylish design and reliable performance of your new Kohler Fairfax lavatory faucet.

Advantages of Kohler Fairfax Lavatory Faucets
When it comes to choosing the right faucets for your bathroom, there are a number of factors to consider – style, durability, and functionality being among the most important. Kohler, a leading brand in kitchen and bathroom fixtures, offers a wide range of high-quality faucets to meet the diverse needs of homeowners. Among their many products, the Kohler Fairfax lavatory faucet stands out as a popular choice for its elegant design and exceptional performance.
Timeless Design
One of the key advantages of Kohler Fairfax lavatory faucets is their timeless design. With its classic silhouette and elegant curves, the Fairfax faucet adds a touch of sophistication to any bathroom. The faucet’s transitional design makes it suitable for both traditional and contemporary bathroom styles, making it a versatile choice for homeowners with various design preferences. Whether you have a vintage-inspired bathroom or a modern spa-like retreat, the Fairfax lavatory faucet effortlessly complements the overall aesthetic of the space.
Exceptional Durability
Another notable advantage of Kohler Fairfax lavatory faucets is their exceptional durability. Constructed from high-quality materials such as solid brass, these faucets are built to withstand the rigors of daily use. The sturdy construction not only ensures long-lasting performance but also minimizes the risk of leaks and corrosion, providing added peace of mind for homeowners. Additionally, Kohler’s superior craftsmanship and attention to detail further contribute to the durability of the Fairfax lavatory faucet, making it a reliable and enduring fixture in any bathroom.
Efficient Performance
In addition to its elegant design and durability, the Kohler Fairfax lavatory faucet is celebrated for its efficient performance. The faucet features a single lever handle that allows for effortless temperature and water flow control, making it user-friendly for individuals of all ages. Moreover, Kohler’s innovative ceramic disc valves provide smooth and reliable operation, minimizing drips and ensuring consistent water flow. Whether you’re washing your hands or filling up the sink, the Fairfax lavatory faucet delivers a seamless and satisfying user experience every time.
Water-Efficient Technology
As water conservation becomes an increasingly important consideration for homeowners, Kohler has integrated water-efficient technology into their Fairfax lavatory faucets. Many models are equipped with Kohler’s WaterSense-certified aerators, which reduce water usage without compromising performance. By incorporating air into the water stream, these aerators maintain strong pressure while using less water, ultimately helping to conserve this precious resource and reduce utility bills. With the Kohler Fairfax lavatory faucet, you can enjoy a luxurious and indulgent bathroom experience while also doing your part to promote environmental sustainability.
Ease of Installation
Installing a new faucet can be a daunting task for many homeowners, but Kohler Fairfax lavatory faucets are designed with ease of installation in mind. With their flexible supply lines and simple mounting hardware, these faucets can be installed quickly and efficiently by DIY enthusiasts or professional plumbers alike. Additionally, Kohler provides clear and comprehensive installation instructions, ensuring a smooth and hassle-free setup process. Whether you’re embarking on a bathroom renovation or simply looking to upgrade your existing fixtures, the straightforward installation of the Fairfax lavatory faucet makes the process much more manageable.

Conclusion
Installing a Kohler Fairfax lavatory faucet is a straightforward process that can be completed with just a few tools and some basic DIY skills. By following the steps outlined in this guide, you can successfully install a Kohler Fairfax lavatory faucet and enjoy the benefits of its sleek design and durable construction. Remember to take your time, double-check your work, and always follow manufacturer’s instructions for best results.
